
WOO! The first page for Free Time! So this is really the first project I have worked on in my free time. And it so happens that it is for my mother's birthday. Hence the name of this tab. I actually do a lot of "arts and crafts" for people on their birthdays, anniversary, or special events. It shouldn't take too long to get a few up on this page. Anyway, my mother's Chines Zodiac sign is a horse, and she has a special element assigned to her birth year, which is fire. Ironically, the horse is her favorite animal and fire is her Celestial Zodiac sign's element. Plus it helps that when she is mad, shes MAD. So fire can fit her temper. If your reading this mom, I love you and you have to admit that your anger is not something people WANT to invoke.
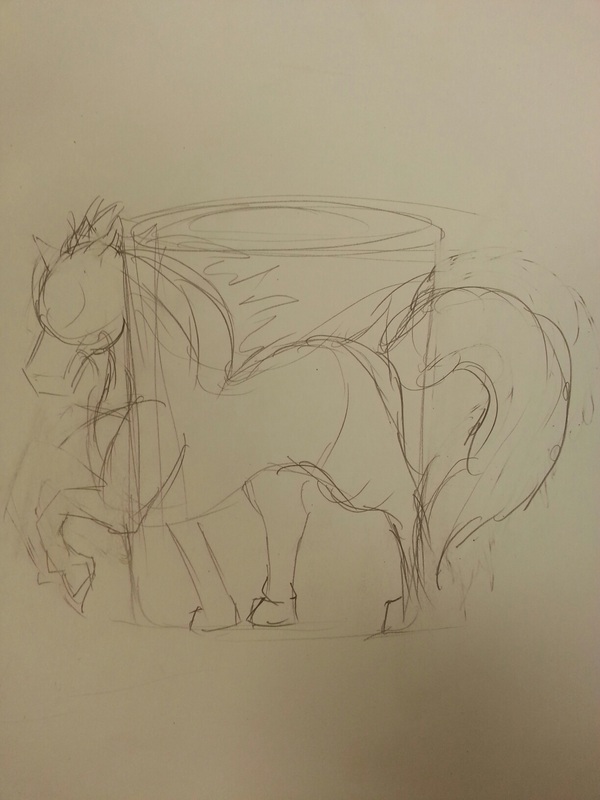
This is a sketch of my idea, its not going to be protruding from the cup like you see here, it's just to help me get an idea of what I want to do and how I'm going to wrap it around.
|
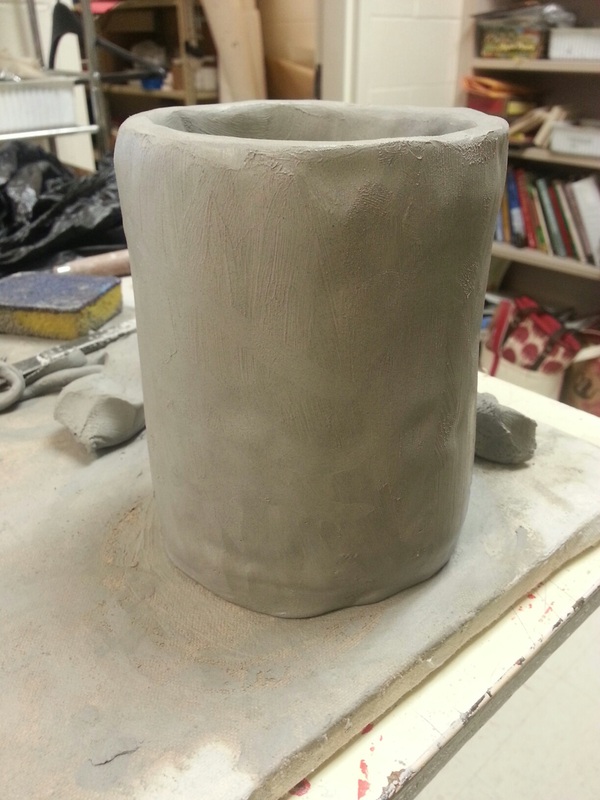
V-wola, a cup shape! I have not learned how to throw yet so I rolled out the cup using slabs then measured, cut, scored, slipped, and sliced down to size.
|
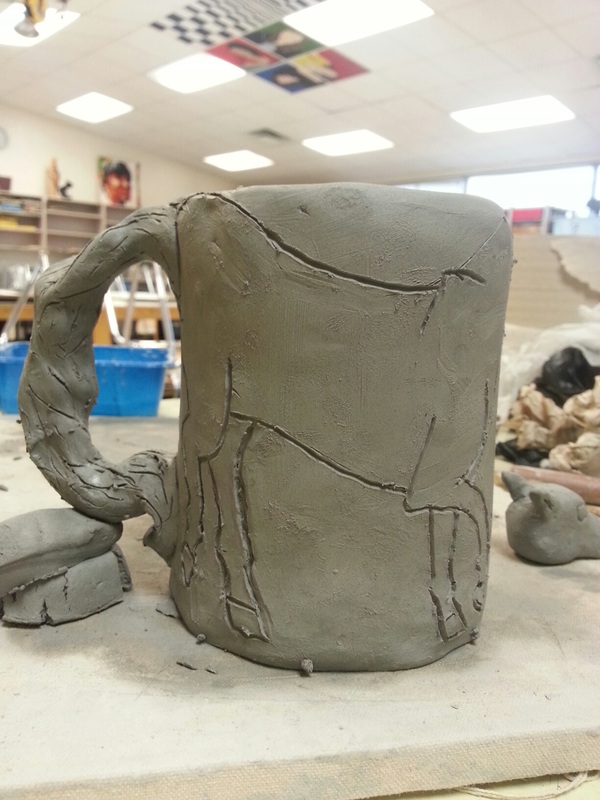
Got the basic handle on there. It kind of looks like a horse tail. The coil is there to help it keep it's shape while it drys. And then I etched the horse body to make sure the head isn't to big or to small.
|
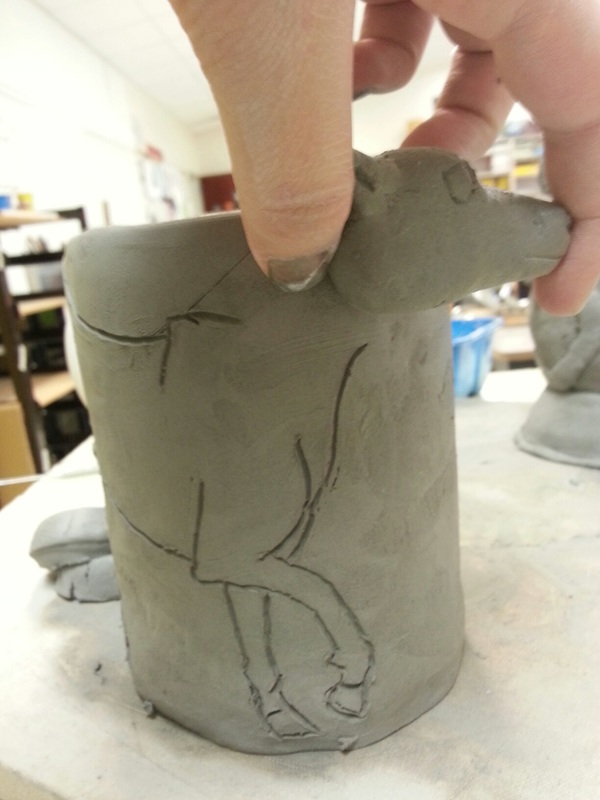
WOOO! The head fits! :D I made the head before I etched on the body and was just keeping my fingers crossed. I guess I did know what I was doing though. I love it when that happens. Don't second guess yourself is the lesson here. :)
|
I attached the head and added clay tobump out the horses body to make it look more visually appealing. Now the head doesn't look like it's randomly polling off the cup. I cut you fire horse to balance out the other side of the cup. Also I made a flowing main and added the same texture to the handle to tie it all together. I didn't put it all over the handle though so that they wouldn't brake off when someone uses it. It looks more fiery to me this way.
Ryan's Christmas Present
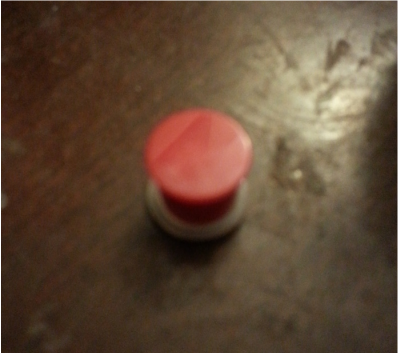
I bought these red 00 gauges cause Ryan has been wanting a Poke'mon gauge FOREVER. However they are very expencive because they are Poke'mon. So I thought, why don't i just make them? And when a sale came I bought these and a decoy pair so he wouldn't know. I got red cause it would be eser to only worry about the white half rather than the both. But it will work with any gauge.
|
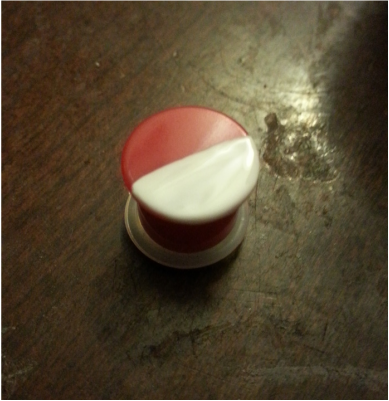
Paint half the poke'ball with the needed color. In This case its white. It is okay if you go a lil over the middle because we will use black for the center. Do this to both gauges.
|
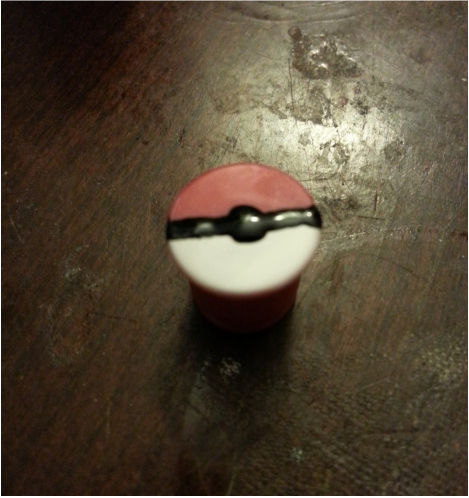
When the white dries you can take a detail nail brush or a tooth pick and put a black line in the center and a black dot in the center. Make sure it is big enough to put a white dot in the center of the black dot for the poke'ball button.
|
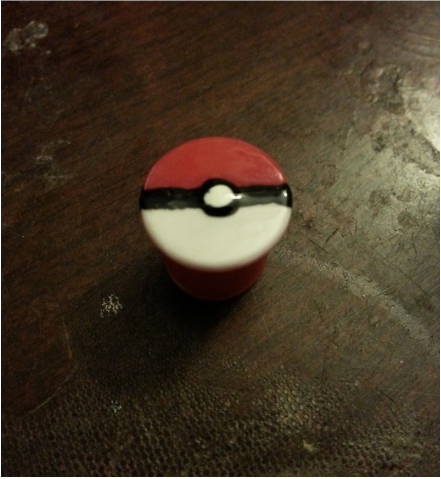
When the black is dry put a white dot in the center. Wait till the whole thing is dry then put a clear coat on top. I would put two just in case. Let it dry and viola, Poke'mon gauges!
|
